Data Validation in Excel
Apply data validation in Excel to restrict users from entering only certain types of information in a cell. This example allows users to type only whole numbers between 0 and 10.

💎 Create a Data Validation Rule
Use the following steps to create a data validation rule.
1. Select cell C2.
2. Go to the Data tab, find the Data Tools section, and click Data Validation.

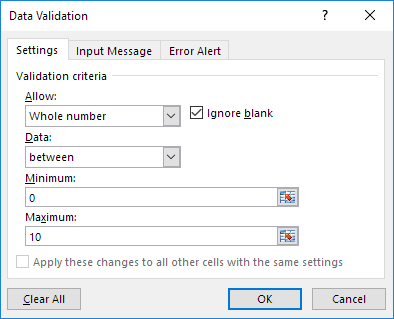
On the Settings tab:
3. In the Allow list, click Whole number.
4. In the Data list, click between.
5. Enter the Minimum and Maximum values.
💎 Input Message
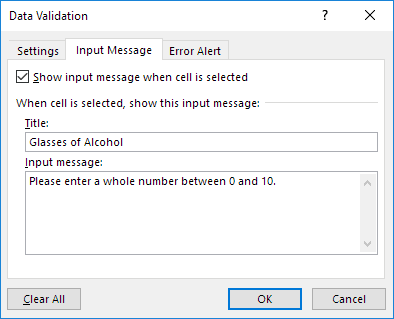
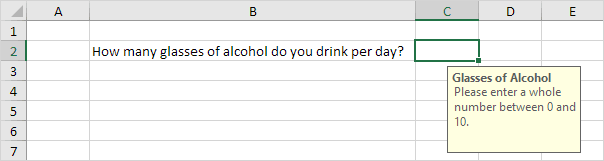
An input message is displayed when the user selects the cell, providing guidance on the data to be entered.
On the Input Message tab:
1. Ensure that the option “Show input message when cell is selected” is enabled.
2. Enter a title.
3. Enter an input message.
💎 Error Alert
If users ignore the input message and enter an invalid number, you can display an error message.
On the Error Alert tab:
1. Make sure “Show error alert after invalid data is entered” is checked.
2. Enter a title.
3. Enter an error message.
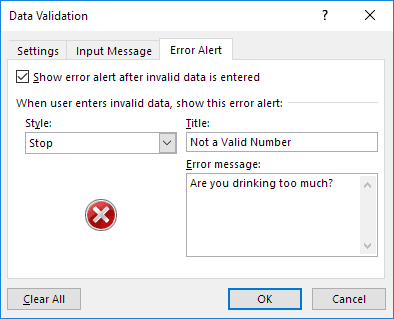
4. Click OK.
💎 Data Validation Result
Now we will check if the data validation works as it should.
1. Select cell C2.
2. Try typing a number that is more than 10.
Result:
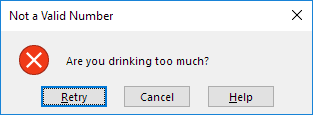
Note: First, select the cell from which you want to remove data validation. On the Data tab, under Data Tools, click Data Validation, and then click Clear All. With the Go To Special feature in Excel, you can quickly highlight every cell that includes data validation.
1/9 Completed! Learn much more about data validation ➝
Next Chapter: Keyboard Shortcuts